Dive into our blog for the latest coffee insights, from new releases and expert reviews to educational content and sustainability efforts. Explore stories from the roastery, learn about coffee origins, and discover delicious recipes.
Espresso dialling in is a daily basic for all baristas and serves as the mainstay of their craft. It is this fundamental process that guarantees customers the best and most uniform coffee experience every day. While the art of dialling in is rewarding when mastered, it can present some challenges. If you lack experience or know-how, the task can feel a bit perplexing or just plain frustrating. In this guide, we aim to provide a detailed, very approachable, step-by-step method to ensure your success and efficiency in dialing in your espresso.
What Is Dialling In?
The process of optimizing espresso extraction for the best flavor profile possible is what "dialing in" means. Ideally, baristas want to create an espresso that has all the right flavors present in the highest possible concentration. To get there, they have to adjust three main things: dose, yield, and brew time.
Each of these has a significant impact on the flavor of the finished product. When baristas are "dialing in," they try to keep everything as constant as possible and only change one thing at a time. This gives them a much clearer idea of what each variable is really doing to the espresso. Their goal is to hit the sweet spot, and understanding extraction is crucial to that. Baristas want to avoid both under-extraction (sour, weak, fast) and over-extraction (dry, bitter, slow).
Effectively dialing in espresso requires the following:
Two sets of accurate digital scales: You will need one set to weigh your dose and another set for your yield. You can, of course, use the scales yourself to measure both, but the less you have to touch the scales, the more you are like an espresso machine. If you happen to have an espresso machine that can measure yield, then congratulations: you have achieved a larger scale set.
A flat tamper: The more "snug" and "fit" the tamper is to the portafilter basket, the more enhancements to extraction you achieve—unless the coffee puck is so tight that it's been over-compressed.
Portafilter baskets: First, let's think about these baskets. They should prevent the tamper from getting log-jammed (meaning stuck) and interrupting the tamping process.
A bottomless portafilter: This is designed without a spout, so you can see the bottom of the basket. This will allow you to spot channeling – which is when the coffee puck becomes damaged or uneven – much more easily.
Parameter One: Dose
The term "dose" describes how much of the dry, roasted coffee is placed in the portafilter for brewing. Baristas commonly consider this to be the first and perhaps most important step in analytical brewing because it has such a strong influence on the outcome—that is, how "good" the coffee tastes.
The ideal dose depends on several factors (see below). However, the typical range is between 18 and 22 grams. At the very least, you should weigh your coffee and use the same amount every time you brew to establish a baseline. From there, you can vary the dose and note the differences in flavor and other qualities. Always remember that if you are using a smaller or larger amount of coffee, you also need to adjust the amount of water accordingly to maintain a proper brew ratio.
Choosing the proper dose can be difficult and may require some fine-tuning during the initial setup. Changes in taste will mean changes in other aspects of your espresso's prep. If you think you need to up the dose, do it in small increments. If you think your espresso might be too intense and just teetering on the edge of pleasantness, bump down your dose in the same small increments. Once you find the right amount, try to use it consistently so that you have a firm baseline for making other changes.
Parameter Two: Yield
What is meant by "yield"? It means the wet weight of the extracted espresso. But a better way to understand it is through some basic principles of extraction. Think about two of these principles when you consider yield:
The higher the yield, the more water has been passed through the coffee – meaning a higher extraction level.
The higher the yield, the less concentrated the espresso will be.
Now, how do we define yield with respect to dose using ratios? A common starting point is the 1:2 ratio. For every gram of coffee, we use 2 grams of water. This is a pretty good ratio, and if you're not getting it right with the 1:2, then either go to the 1:1.5 for a more concentrated shot or to the 1:2.5 for a more diluted shot.
Espresso requires dialing in, which is a delicate, demanding process that is very much like a dance. It takes patience, precision, and practice to know the steps and to carry them out smoothly over the course of the day. You can't rush this if you want to arrive at a destination that will delight your customers. Even if we know the ideal steps to carry out and the key parameters to pay attention to, espresso dialing in is as much a part of the art and science of the barista's work as pulling a good shot is.
Parameter Three: Brew Time
The espresso-making process has many variables. Of all these, brew time might be the most crucial and certainly the most flexible. It can and does affect the flavor outcome of the espresso in large measure, and if you're not thinking and not tasting with your brew time, you're just not dialed in, period. Most coffee shops aim for brew times ranging between 22 and 40 seconds, with the sweet spot often being between 25 and 32 seconds. Remember, though: the brew time itself is pretty pointless if you're not using it to affect the flavor outcome in some desirable way.
Brew time and flavor are directly related. If you don’t brew long enough, the coffee just isn’t going to have enough flavor. Brew too long, and you’re over-extracting (like the folks at Starbucks do). The scale goes something like this: too little brew time, too much acidity; ideal brew time, balance of flavors; too much brew time, too much bitterness.
When you change the brewing time, you have to take into consideration the grind size. An easy way to visualize this is to think about how water flows through coffee grounds of different sizes. With a grind that is too coarse, it is like using rock-sized particles; the water flows through the grounds much too quickly. These grounds don't have enough time to reach their full flavor potential. You would then want to try a grind that is at least a little bit finer in order to achieve the proper flavor balance. This is also, to be honest, a close-tolerance grind. Going too far to the side of too fine will lead to watery, over-extracted coffee. To achieve this close flavor-tolerating grind, an adjustable burr grinder is a good tool.
It is crucial to adjust the grind size in small increments. Although we tend to think of grind size as a kind of dial or continuum between "too fine" and "too coarse," in reality, getting a good extraction or even a decent cup of coffee using a specific brew method is often a matter of hitting the "sweet spot" on that grind size dial.
Setting the brew time, dose, and yield is only half the battle when it comes to making the perfect espresso. The other half is tasting it. What are we looking for? A harmonious balance of acidity, sweetness, and bitterness, with some combination of the four more pronounced or less pronounced in different espressos.
Tasting The Espresso
A brief indication of the balance of flavors possible is this: a well-extracted espresso is a sweet drink. Sweetness is primary in the espresso flavor hierarchy. When the espresso is under-extracted, the drink's acid notes tend toward sourness, and there's insufficient sweetness to balance the flavor. If we are over-extracting the coffee, then those flavors predominantly fall on the bitter end of the spectrum. We are using much more energy to extract out of those bitter compounds, and the drink may taste hollow. "Well" extracted means, in essence, "tastes sweet."
Assessing the quality of espresso in combination with milk is equally vital, as a significant proportion of the customer base favors milk-infused beverages. The milk's sugars and fats can serve to amplify the inherent sweetness of the espresso while muting and rounding off the sharper acidic or bitter notes that might otherwise be too pronounced.
Tips For Further Improvement
When it comes to mastering the art of espresso extraction, we strongly advocate for the following practices:
Only change one parameter at a time. This will help you keep track of how your extraction is changing, and what’s causing it. For example, if you’re adjusting your grind, then keep the brew time, dose, and yield the same.
Keep other variables constant. Create an evenly distributed bed of coffee in the portafilter, and tamp using the same method every time you pull a shot. Not distributing evenly enough or tamping too lightly will affect extraction.
Make a dialling in journal. Every time you dial in, record your parameters, and figure out what works best. This will help you dial in more quickly and successfully.
Stay hydrated. Dialling in often involves tasting a lot of espresso in a short period of time, which can affect your palate and obscure the more subtle flavours of each individual espresso. It can also mean you end up being over-caffeinated, which can cause dizziness, shaking, shortness of breath, and an increased heart rate. You should drink plenty of water before, during and after the entire process.
Espresso dialing can be an infuriating, yet rewarding first-step, from which you can almost taste your route to mastery and profitability. It has been my experience, both as a trainer and a practicing barista, that if you can break down the art of espresso extraction into significant variables, then further into individual espresso techniques, novices and experienced baristas alike will uncover the not-so-secret to consistently good espresso. That secret? Following your variables with damn good attention to detail and a medium amount of patience.
At Ember Coffee, we air-roast every batch in Big Lake, Minnesota. Browse our our espresso beans, or learn about how air-roasting works.
As the leaves turn and the air grows crisp, the aroma of freshly roasted coffee mingles with the scent of spices at Ember Coffee. Here in Big Lake, Minnesota, we've perfected a unique twist on the classic pumpkin pie by infusing it with our decadent Pumpkin Spice coffee. This dessert not only celebrates the flavors of fall but also our commitment to craftsmanship and quality.
Coffee-Infused Pumpkin Pie
Ingredients:
1 9-inch unbaked pie crust
1 cup heavy cream
1/2 cup Ember Coffee's Pumpkin Spice coffee, brewed strong
1 cup pumpkin puree
2 large eggs
3/4 cup brown sugar
1 tablespoon cornstarch
1 teaspoon cinnamon
1/2 teaspoon ginger
1/4 teaspoon nutmeg
1/4 teaspoon salt
Whipped cream, for serving
Instructions:
Preheat the Oven: Set your oven to 375°F (190°C).
Prepare Coffee-Infused Cream: In a saucepan, combine the heavy cream and brewed Pumpkin Spice coffee. Heat gently until just simmering, then remove from heat and let it cool slightly.
Mix the Filling: In a bowl, whisk together the pumpkin puree, eggs, brown sugar, cornstarch, cinnamon, ginger, nutmeg, and salt. Gradually stir in the coffee-infused cream.
Assemble the Pie: Pour the pumpkin mixture into the unbaked pie crust. Smooth the top with a spatula.
Bake: Place the pie on a baking sheet and bake for 50-60 minutes, or until the filling is set and a knife inserted into the center comes out clean.
Cool and Serve: Let the pie cool completely. Serve with a dollop of whipped cream and a sprinkle of cinnamon.
An Invitation to Savor Fall
This coffee-infused pumpkin pie is more than just a dessert; it's a testament to the inventive spirit at Ember Coffee. Not only does it capture the essence of autumn with every bite, but it also highlights the harmonious blend of our expertly roasted coffee with the comforting flavors of a holiday classic.
We invite you to try this recipe at home, share it with loved ones, and perhaps even start a new tradition. And while you're savoring each slice, think of the warm, community-focused atmosphere of our Big Lake café, where every product is crafted with care and a touch of creativity.
Join Our Coffee Community
If you loved this recipe, consider subscribing to our coffee club! We offer our Roaster's Choice and our Blend Shuffle—both delivered straight to your door. Stay connected with the Ember Coffee family, where each cup brings you closer to the heart of our community.
Enjoy the flavors of fall, one coffee-infused slice at a time! 🍂
At Ember Coffee, we air-roast every batch in Big Lake, Minnesota. Browse our air-roasted coffee, or learn about how air-roasting works.
Cold brew coffee has taken the coffee world by storm in recent years, promising a smoother, less acidic beverage that's perfect for hot summer days. But what exactly is cold brew coffee, and how is it different from regular coffee?
We get asked this quite frequently at our coffeeshop in Big Lake, Minnesota. On our website, we've even had people as far as Maine chat with our roasters asking for recommendations. So here's a collection of notes and thoughts we share from our experience here at Ember Coffee Co. as local roasters.
What is Cold Brew Coffee?
Unlike iced coffee, which is brewed hot and then cooled, cold brew coffee is made by steeping coarsely ground coffee beans in cold or room temperature water for an extended period, usually 12-18 hours. This slow extraction process results in a coffee that is often described as smoother and less acidic than its hot-brewed counterpart.
Benefits of Cold Brew Coffee
Cold brew coffee offers several advantages over traditional hot-brewed coffee:
Lower Acidity: The cold brewing process extracts fewer acidic compounds, making the coffee easier on the stomach and less bitter.
Smoother Flavor: The extended brewing time allows for a more gradual extraction of flavors, resulting in a coffee that's rich and smooth.
Versatility: Cold brew can be enjoyed straight, diluted with water or milk, served hot or cold, and used in various recipes like cocktails and desserts.
Why You Should Try Cold Brew Coffee
Cold brew coffee is worth exploring for any coffee enthusiast. Its unique flavor profile, lower acidity, and versatility make it a great addition to your coffee repertoire. Plus, it's perfect for making large batches that can be enjoyed throughout the week.
If you're new to cold brew, start with our basic recipe and experiment with different beans and ratios until you find your perfect brew. For those looking to elevate their cold brew game, consider trying [Placeholder for Product Name], which is specially selected for cold brewing.
As they say, "good things come to those who wait." If you can wait 12-18 hours for your coffee to brew, you're in for a treat with cold brew coffee.
Make Cold Brew Coffee at Home
Making cold brew coffee at home is simpler than you might think, and you don't need any special equipment—though we DO have some special kits about to be dropped soon! But anywho. here's a basic recipe to get you started:
Ingredients:
1 cup coarsely ground coffee beans
4 cups cold or room temperature water
Instructions:
Grind the Beans: Use a coarse grind, similar to what you would use for a French press.
Combine Coffee and Water: In a large jar or French press, mix the coarsely ground coffee with water.
Steep: Cover and let it steep at room temperature for 12-18 hours.
Strain: Use a fine mesh sieve or a coffee filter to strain the coffee grounds from the liquid.
Serve: Dilute the cold brew concentrate with water or milk to your taste. Serve over ice and enjoy!
Interesting Cold Brew Recipes
Cold brew coffee is incredibly versatile, and there are countless ways to enjoy it. Here are a few recipes to try:
Cold Brew Concentrate: Use a stronger coffee-to-water ratio (1:4) and steep for 18 hours. This concentrate can be used in cocktails or diluted to your desired strength.
Cold Brew Espresso Martini: Mix 25ml vodka, 35ml coffee liqueur, and 35ml cold brew concentrate. Shake with ice and serve in a chilled glass.
Cold Brew Latte: Mix cold brew concentrate with whole milk and ice. Adjust to taste.
Tropical Latte: Add sugar and light coconut milk to cold brew concentrate for a refreshing twist.
Best Coffees for Cold Brew
Almost any coffee can be used for cold brew, but certain types may yield better results. If you prefer fruity notes, try a Colombian coffee. For a smoother, chocolatey profile, go with a Mexico or Papua New Guinea coffee. For a balanced, complex brew, we recommend our signature El Jefe.
At Ember Coffee, we air-roast every batch in Big Lake, Minnesota. Browse our air-roasted coffee, or learn about how air-roasting works.
Kickstart your St. Paddy's Day with our Irish Coffee Recipes.
Each recipe was intentionally crafted to highlight the flavors of our Barrel Aged Blend complimented by your favorite Irish Whiskey. Our Barrel Aged Blend can be purchased in our Big Lake location as well as on our website.
To make the cold brew concentrate at home, we have a great tutorial for making cold brew at home. Enjoy your day and drink responsibly!
Irish Coffee
Ingredients:
1oz Irish Whiskey
0.5oz Simple Syrup
4oz Brewed Coffee (Barrel-Aged Coffee)
Top with Frothed Heavy Whipping Cream
Garnish with a gentle dash of ground Nutmeg
Instructions:
Brew Ember Coffee's barrel-aged coffee. For the perfect brew, we recommend using 20g of coffee to 160g of water.
Do this with a double-strength extraction and an 8:1 water-to-coffee ratio. This gives the drink a strong and distinct flavor, which adds depth to the finished product. Making it a smooth, bold, coffee-centric cocktail.
In a 6-ounce glass, combine 1 ounce of Irish whiskey and 0.5 ounces of simple syrup.
Add 4oz of Ember Coffee's barrel-aged coffee. Make sure to still measure this out, as the actual amount brewed may be larger than 4oz and may overfill the glass.
Once everything is in your glass, froth the heavy whipping cream. We recommend using a milk frother that produces a nice micro foam or whatever method you prefer to froth milk. The goal is to get the cream thick and smooth, so it can still flow but isn't too liquidy.
When your frothed milk is ready, hold a spoon just above the glass upside down. Then, pour the cream over the back of the spoon, gently layering it on top of your brewed cocktail.
Garnish with ground nutmeg and enjoy!
Iced Irish Coffee
Ingredients:
1oz Irish Whiskey
0.5oz Simple Syrup
4oz Brewed Coffee (Barrel-Aged Coffee)
Top with Frothed Heavy Whipping Cream
Garnish with a gentle dash of ground Nutmeg
Instructions:
Use a small cold-brew set to brew Ember Coffee's barrel-aged coffee. Use a 5:1 ratio of water to coffee to make the cold brew. Let it brew in the fridge for 16 to 18 hours.
Tip: For this particular cocktail, we like to leave this as a concentrate because we think it gives the final drink more depth and flavor. This makes a strong, well-balanced cocktail that focuses on coffee.
After brewing, put it in a jar and refrigerate until you're ready to make the cocktail.
Pour 1 ounce of Irish whiskey in a six-ounce glass and add 0.5 ounce of simple syrup.
Then add 4 ounces of Cold Brew Concentrate Coffee. Still measure this out, because the amount that was brewed might be more than 4oz and fill the glass too much.
After putting everything in the glass, it's time to whip the heavy cream until it foams. We recommend using a milk frother that produces a nice micro foam or whatever method you prefer to froth milk. The goal is to get the cream thick and smooth, so it can still flow but isn't too liquidy.
When your frothed milk is ready, hold a spoon just above the glass upside down. Then, pour the cream over the back of the spoon, gently layering it on top of your brewed cocktail.
Garnish with ground nutmeg and enjoy!
It's a fun journey that takes precision, patience, and desire to learn how to make the perfect cup of coffee using the pour-over method with a V60 or Kalita brewer. This step-by-step guide will show you the tools, methods, and insider tips you need to take your coffee experience to a whole new level.
Join us on this tasty adventure as we learn about the art and science behind the pour-over method and how it can bring out the best in your coffee beans, whether you're a specialty coffee expert or just a coffee lover who likes to learn more. Get ready to be awakened and enjoy every sip of perfectly made coffee in your home.
Introduction: The Art of Pour Over Coffee
The beauty of pour over brewing
Pour over brewing is more than just a way; coffee lovers love it as a personal ritual. It's beautiful because it's simple and gives you power over every part of the brewing process. With each pour, you can bring out a range of tastes that might otherwise stay hidden in the complex profile of a coffee bean. From the smell of fresh grounds to the last drop in the pitcher, it's a sight, sound, and touch experience.
With its cone-shaped shape and spiraling grooves, the V60 is perfect for this. It makes it possible for a consistent extraction, which brings out complex notes that can be anything from fruity and bright to earthy and rich. When you master pour over, you're not just making coffee; you're creating an experience that shows how much care and attention you put into it.
Why choose the V60 method
Choosing the V60 method for pour-over coffee ensures precision and clarity in your cup.
The V60's unique design, with angled sides and a single large hole at the bottom, allows for a fast and efficient flow rate. This means that you can fine-tune the extraction time and pour to highlight different flavor profiles. The spiral ribs on the interior wall also help to keep the filter from sticking, resulting in a consistent and even extraction. What distinguishes the V60 is its versatility—it can accommodate a variety of grind sizes and pouring speeds, making it the preferred tool for both novice and experienced baristas.
Choosing the V60 means embracing a brewing technique that is as much about the process as it is about the end result. It is intended for those who see coffee brewing as an art form to be perfected, rather than a daily routine.
Essential Elements for Mastering the Pour Over
Selecting quality coffee beans
Selecting high-quality coffee beans is the first step in creating an enjoyable pour over. The right beans can make all the difference in your brew, resulting in a cup full of complex aromas and flavors. For the best results, use fresh, whole bean coffee from a local Minnesota coffee roaster like Ember Coffee. Our beans are carefully sourced and roasted to highlight the distinct characteristics of each batch.
Look for beans that have been roasted within the last two weeks to ensure maximum freshness. Single-origin coffee is ideal for pour over because it highlights the distinct flavor of the region from which it is sourced. Consider the roast profile as well; a lighter roast will have brighter, more acidic notes, whereas a darker roast will be fuller-bodied, with a stronger, more robust flavor.
Remember that the quality of your beans determines the caliber of your coffee.
Understanding the importance of water quality
Water quality is critical when brewing pour-over coffee. After all, coffee contains over 98% water. The minerals in water have a significant impact on the taste and extraction of coffee. Hard water with a high mineral content can over-extract, whereas soft water may under-extract, resulting in a flat or sour taste.
For a balanced brew, use filtered or spring water with a neutral pH and moderate mineral content. This ensures that the water does not overpower the coffee's natural flavors and aromas. Furthermore, the temperature of the water should be just off the boil, between 195 and 205 degrees Fahrenheit, to optimize extraction without burning the coffee. The interaction of water and coffee grounds during the pour over process is delicate; good water quality can bring out a coffee's best notes, elevating a good cup to a great one.
The role of the coffee grinder
The coffee grinder is more than just a tool; it is the gatekeeper of flavor. A consistent grind is essential for a balanced pour over because it influences how water flows through the coffee grounds and extracts flavor.
A burr grinder is ideal because it produces a uniform grind size, which is essential for the V60's consistent brew. A fine to medium-fine grind is ideal for the pour over method because it slows down the water flow just enough to extract the full range of flavors without overdoing it.
Avoid using a blade grinder, as it can produce uneven grounds and an inconsistent taste. Investing in a quality grinder means you're not just grinding beans; you're building the foundation for your pour over. Take the time to adjust your grind size, and you'll notice the subtleties and depth that a well-ground coffee can provide in each cup.
Importance of the right brewing equipment
The right brewing equipment can transform your pour-over from ordinary to extraordinary. Starting with a dependable V60 dripper that ensures consistent extraction, it's critical to pair it with the right filter paper, which can affect the flow rate and flavor of your coffee.
Another useful tool is a gooseneck kettle, which provides the control required for a precise pour, allowing you to evenly saturate the grounds and maintain the optimal brewing temperature.
A scale is equally important, as it allows you to accurately measure your coffee and water for consistent strength and flavor.
Don't overlook the carafe or cup you're brewing in; heat retention is critical. Investing in long-lasting, consistent equipment will result in a more reliable and enjoyable coffee brewing experience. With the right tools, your pour over routine will become a dependable method for creating the ideal cup.
Step-by-Step: Brewing Your Perfect Cup of Coffee
Prepping your coffee workspace
Before you start brewing, make sure your coffee workspace is clean and organized. Begin by gathering all of your equipment, including the V60, filter, grinder, scale, kettle, and carafe or mug. Make sure your workspace is close to a water source and has a level surface for your scale.
Rinse the V60 filter with hot water to remove any paper taste and warm up the brewer; this also allows the filter to adhere to the dripper's sides. Remove the rinse water before you begin brewing. Measure out your coffee beans and get your grinder ready. Preheat your kettle to the desired temperature, usually between 195 and 205 degrees Fahrenheit.
An organized workspace streamlines your workflow and allows you to focus on the art of brewing, ensuring that every step is executed with precision for the perfect cup of coffee.
Achieving the right coffee to water ratio
The coffee-to-water ratio is an important factor in the pour over process. It can make the difference between a rich, flavorful cup and one that is disappointing.
A general rule is to use a 1:16 ratio of coffee to water, which equates to about 1 gram of coffee for every 16 milliliters of water. A single cup typically contains 20 grams of coffee and 320 milliliters of water. However, don't be afraid to change the ratio to suit your tastes.
Some coffee drinkers prefer a stronger brew and may choose a 1:15 ratio, whereas others may prefer a lighter cup with a 1:17 ratio. Using a scale ensures precision and consistent results every time you brew. Mastering this aspect of pour over brewing allows you to customize your coffee to your exact preferences, resulting in a truly personalized coffee experience.
The art of pouring: technique and timing
Pouring is an art form in pour-over coffee making. A steady, controlled pour is essential for achieving an even extraction. Begin with a slow pour in the center, then spiral outwards to ensure that all of the grounds are wet during the initial bloom. This stage allows gases to escape, and waiting about 30 seconds before the next pour improves flavor development.
After the bloom, pour in a slow, steady spiral, keeping the water level consistent to ensure an even extraction. The total brew time should be between two and three minutes. If it's too fast, grind finer; if it's too slow, grind coarser. The right technique and timing bring out the coffee's best qualities, ranging from bright acidity to rich sweetness. The goal is a harmonious balance of flavors, which can only be accomplished through patient and skilled pouring.
Tasting and refining your brew
Tasting and refining your brew is a continuous learning process that helps you improve your pour over technique. After brewing, take a moment to enjoy the aroma before sipping. Evaluate the taste. Is it overly bitter or sour? Does it have the right body, or is it too weak? These cues will direct your adjustments.
If the coffee is too bitter, it may be over-extracted; try grinding coarser or pouring faster. If it's sour, it may be under-extracted, requiring a finer grind or a slower pour. Make notes about your brews, including the coffee-to-water ratio, grind size, pouring technique, and tasting notes.
This practice aids in repeating successes and avoiding previous mistakes. Over time, you'll gain a better understanding of how each variable affects taste, allowing you to consistently create a cup that's perfect for your taste.
Ember Coffee is Your Go-To for Pour Overs
Local Minnesota Coffee Roasters: Our story
Ember Coffee, located in the heart of Big Lake, Minnesota, began with a simple goal: to create the best pour over coffee experience. As Minnesota coffee roasters, our story is rooted in community and a commitment to quality. We started small, roasting in a second floor office space and sharing the results with our friends and neighbors. (Yes, we carried the bags upstairs!)
The response was overwhelming—not only did our coffee taste great, but it also brought people together. This fueled our desire to improve our roasting techniques, find the best single-origin beans, and perfect our blends. Our approach is personalized; we roast in small batches to ensure freshness and flavor.
Ember Coffee has grown, but our mission remains unchanged: to make coffee that embodies the spirit of our Minnesota roots — honest, down-to-earth, and welcoming to all. When you choose Ember, you're not just purchasing coffee; you're joining a story that celebrates local craftsmanship and a community's love of great coffee.
What sets Ember Coffee beans apart
Ember Coffee stands out from the rich tapestry of coffee culture for a variety of reasons. Our commitment to quality begins with carefully selected beans sourced from the world's finest coffee-growing regions. We prioritize fair trade and sustainable practices, ensuring that our coffee not only tastes great but also benefits ethical farming communities. Once the beans arrive in Big Lake, Minnesota, we begin the roasting process, which is both an art and science. We roast in small batches, allowing us to highlight each bean's unique flavor profile.
The end result is a cup of coffee that is smooth, balanced, and stomach-friendly, without the harshness found in larger commercial roasts. At Ember Coffee, we've created something unique—a coffee experience that reflects our unwavering dedication to quality.
Our beans are more than just unique; they represent the care, attention, and community spirit of our Minnesota roots.
Ember Coffee: Elevating Your Coffee Experience
The Roaster's Choice: A monthly exploration
Ember Coffee believes in keeping the coffee experience fresh and exciting. That's why we have our 'Roaster's Choice,' a monthly feature in which we highlight a different, carefully chosen coffee. It is our way of taking you on a monthly journey through the world of coffee. Each selection is chosen for its distinct qualities and flavor notes, allowing our customers to try new profiles that they might not otherwise choose. These beans are meticulously roasted like all of our coffees, ensuring that you get the best of what each variety has to offer.
Our 'Roaster's Choice' is more than just a subscription; it's a ticket to the diverse world of coffee, chosen by those who know and love it best. Join us in this monthly exploration as we discover the diverse and vibrant flavors of coffee.
Convenient subscription options for coffee lovers
Ember Coffee provides convenient subscription options to those who have made coffee a part of their daily routine. Our subscriptions are designed to deliver the freshest, most flavorful coffee directly to your door. You can select from a number of our single-origin coffees and blends, including the exclusive Roaster's Choice selection.
With our subscriptions, you will never run out of your favorite beans. You'll also save money; subscribers receive a 10% discount on all orders. Plus, our flexible plans allow you to customize the frequency of your deliveries, ensuring that you are always stocked based on your personal coffee consumption.
Whether it's for a morning pour over or an afternoon pick-me-up, our subscription service ensures you always have a high-quality cup of Ember Coffee to enjoy.
Ready to Start Your Perfect Pour Over Journey?
Shop Ember Coffee today
The perfect pour over starts with the right coffee. At Ember Coffee, we make it our mission to provide you with beans that will elevate your brewing experience. Our selection of freshly roasted single-origin coffees and expertly crafted blends comes in 12 oz bags and single-serve K-cups, making them ideal for any brewing method. When you shop with us, you are not only purchasing coffee; you are also supporting a local Minnesota coffee roaster dedicated to quality and community. Each purchase helps you improve your pour over technique with beans that are smooth, balanced, and gentle on the stomach.
Visit our coffee shop in Big Lake, Minnesota, or browse our menu online. Shop Ember Coffee today and experience the difference passion and precision can make in your daily cup.
Start your Ember Coffee subscription for savings
If you want to improve your coffee experience while saving money, starting an Ember Coffee subscription is the ideal solution. With our subscription service, your favorite coffees, including our 'Roaster's Choice,' will be delivered to your door on a regular basis. This not only ensures that you always have fresh, high-quality beans on hand, but also saves you 10% on each order.
Subscriptions are adaptable; you can easily change the delivery frequency and coffee selections to suit your drinking habits. You can also pause or cancel at any time, with no commitment. Starting a subscription is more than just convenient; it represents a commitment to consistently exceptional coffee at a lower cost.
So, why wait? Begin your Ember Coffee subscription today and join a growing community of coffee enthusiasts who value the best, locally roasted beans from Big Lake, Minnesota.
Are you a coffee lover looking for the ideal cup of cold brew? Look no further! In this step-by-step guide, we'll take you through the amazing world of cold brew with Ember Coffee's Dark Roast Mexico Chiapas.
This dark roast, known for its smooth and balanced flavor profile, produces rich, chocolatey notes that pair well with a refreshing cold brew. We will walk you through the entire process, from choosing the right beans to making your own delicious batch at home.
Prepare to elevate your coffee experience and learn the secrets to creating an incredible cold brew. If you want to take your coffee to the next level, we recommend purchasing a bag of our Mexico Chiapas Dark Roast as a single order or as a regular subscription. Prepare to embark on a unique coffee journey!
Discovering Ember's Dark Roast Mexico
The Unique Taste of Dark Roast Mexico Chiapas
Ember Coffee's Dark Roast Mexico Chiapas coffee stands out from the crowd. Its distinct flavor stems from high-quality beans sourced from the lush regions of Chiapas, Mexico. These beans are known for their rich, full-bodied flavor, which remains smooth and balanced even when roasted dark. When you taste our Dark Roast, you'll notice a strong chocolate flavor, which is complemented by subtle notes of ripe fruit and a hint of nuttiness. These complex flavors distinguish our dark roast from other coffees and transform it into a sensory experience.
The beans are carefully roasted in Big Lake, Minnesota, so that each sip reflects our Minnesota coffee roaster team's dedication and passion. It's ideal for a refreshing cold brew if you want a deep coffee flavor without the bitterness that dark roasts are known for.
Why it's Perfect for Cold Brew
Because of its inherent flavor characteristics, the Dark Roast Mexico Chiapas is ideal for cold brew coffee. Cold brewing, which involves steeping coffee grounds in cold water for an extended period of time, tends to extract coffee's rich, deep flavors while leaving the bitter compounds behind.
Our dark roast's chocolatey and nutty undertones flourish in this brewing environment, resulting in a smooth, refreshing beverage that is both robust and gentle on the palate. And the lower acidity of cold brew makes it a more gentle option for coffee drinkers who may be sensitive to the higher acidity found in hot brewed coffee.
By selecting Ember Coffee's Dark Roast Mexico Chiapas for your cold brew, you are setting the stage for an exceptional coffee experience that is full of flavor and surprisingly easy to drink, exemplifying our coffee shop's commitment to providing a superior cup every time.
Mastering Cold Brew : A Step-by-Step Guide
Selecting Your Beans: Why Choose Ember Coffee's Dark Roast
When making cold brew at home, choosing the right coffee beans is critical, and Ember Coffee's Dark Roast Mexico Chiapas is a great option for a variety of reasons. First and foremost, the beans are of exceptional quality. We source our beans from reputable growers in Chiapas, ensuring that each batch meets the highest standards.
The dark roast level of these beans is specifically designed to complement the cold brewing process, bringing out the chocolate and nutty flavors while minimizing bitterness. This results in a cold brew that is smooth, well-rounded, and drinkable at any time of day. Additionally, by selecting our Dark Roast Mexico Chiapas, you are supporting a Minnesota coffee roaster dedicated to sustainability and community. Our beans are not only delicious, but they are also roasted with care and respect for the environment and hardworking farmers.
Preparing for the Brew: Tools and Proportions
Before you begin brewing, you'll need the proper tools.
For cold brew, simplicity is essential. Use a large jar or pitcher, a fine-mesh sieve, and cheesecloth or a coffee filter. A kitchen scale is also useful for accurate measurement and maintaining consistency in your brew. In terms of proportions, a 1:8 ratio of coffee to water is a good starting point.
This means that for every one gram of coffee, you should use eight grams of water. For a typical batch, this equates to about 1 cup of ground coffee to 4 cups of water.
Remember that cold brew is a concentrate, so the finished drink is often diluted with water or milk to taste. The ratio can be adjusted based on how strong you prefer your coffee. Proper proportions are essential for creating the perfect flavor balance in your homemade cold brew.
The Brewing Process: Coarse and Soak
Cold brewing is a simple process that requires patience. Begin by coarsely grinding your Ember Coffee's Dark Roast Mexico Chiapas beans; a coarse grind allows for a cleaner extraction and easier filtering. Place the grounds in a jar or pitcher and gently pour in the cold water, making sure they are all saturated. Stir gently to combine.
Cover the pitcher and leave it at room temperature or in the refrigerator for 12 to 24 hours. The longer it steeps, the stronger and more flavorful it will be.
After steeping, place your sieve lined with cheesecloth or a coffee filter over a large bowl. Slowly pour the mixture through to separate the grounds and liquid. Your cold brew concentrate is ready. It can be refrigerated for up to two weeks. When ready to serve, dilute the concentrate with water, milk, or your preferred creamer to taste.
Enjoy your smooth homemade cold brew!
Here's a Quick Recap
Start by grinding your Ember Coffee whole beans on extra coarse grind setting.
Place your ground coffee in your container then pour cool, filtered water in.
Gently mix to ensure that the grounds are wet.
Seal and let steep in the fridge for 12 to 24 hours.
Place filter above your mason jar and strain the coffee into it.
Pro Tip: Store cold brew in the fridge for up to a week. For extra flavor, add in syrups and milk of your choice. Sip & enjoy with your friends and family!
A Glimpse into Our Coffee Subscription
Ember Coffee's subscription service is designed for those who value a premium coffee experience. Consider the convenience of having our freshly roasted Dark Roast Mexico Chiapas delivered right to your door, eliminating the need to reorder each time. Subscribers have the pleasure of drinking this exceptional brew on a regular basis.
Our coffee subscription is more than just convenient; it is about discovery. Along with your favorites, we offer a Roaster's Choice option that changes monthly, allowing you to sample a variety of exceptional flavors from around the world.
When you subscribe, you save 10% on each order, making it a wise decision for both your palate and your wallet. You can choose the frequency of your deliveries, ensuring you never run out of your favorite brew.
Our commitment as a Minnesota coffee roaster is to provide you with the best, most flavorful coffee beans, conveniently and consistently. Join our coffee subscription program and become part of a community that values quality, sustainability, and the joy of a good cup of coffee.
Embarking on the journey into specialty coffee, the most significant leap towards enhancing flavor is to acquire a good set of barista scales and begin measuring your coffee. While some may view this as excessive, the impact it has is substantial. As you delve into the world of weights and brewing ratios, the old ways of using scoops and approximations will quickly become a thing of the past!
Understanding Coffee-to-Water Ratios
In the realm of coffee, achieving the ideal coffee-to-water ratio plays a pivotal role in crafting an outstanding brew. Whether you're a coffee enthusiast in Big Lake, MN, or have a penchant for air roasting in Minnesota, grasping this ratio is vital to unlock the full potential of your coffee.
What Is A Coffee-To-Water Ratio?
Simply put, a coffee-to-water ratio is the measurement of how much coffee is required for the volume of water you intend to use for brewing, or vice versa.
This ratio varies depending on the brewing technique you employ and your preferred coffee strength. While the latter is a matter of personal taste, the former involves intriguing scientific considerations.
The Science Behind TDS in Coffee
The art of coffee brewing involves an extraction process. When hot water interacts with coffee grounds, it extracts the flavors embedded in the beans. This flavor-rich liquid becomes our beloved coffee. However, not every part of the coffee bean contributes to the flavor, which is why monitoring and controlling the extraction process is crucial.
The benchmark for this control is often expressed as a standard percentage of dissolved solids in the water – TDS (total dissolved solids) quantifies the extent to which coffee compounds have dissolved in our brewing water. Extract too much, and your coffee turns heavy and bitter; extract too little, and it becomes insipid and sour.
Achieving the Optimal TDS%
Each brewing method, including its precise measurements and timings, has been thoroughly studied by coffee professionals and is recognized as the most effective way to attain the ideal TDS and, consequently, flavor.
The primary variables in these recipes include:
The coffee-to-water ratio.
The duration of coffee-water contact.
The brewing pressure applied.
When one of these factors changes, adjustments to the other two are necessary to maintain the superior taste of coffee.
Let’s examine two vastly different brewing methods: the French press and espresso.
Comparing Brewing Ratios Across Methods
Espresso, renowned for its intense flavor, operates under high pressure (9 bars) and has minimal contact time between coffee and water—hence, it demands a relatively high coffee-to-water ratio for achieving the desired flavor. Typically, espresso employs a 1:2 ratio, meaning if you use 18g of coffee, you can expect an output of 36g of espresso—a preference cherished by many Minnesota coffee roasters.
In contrast, preparing French press coffee involves minimal pressure and extended brewing time in minutes, allowing water to thoroughly extract the rich flavors from the ground beans. Consequently, the coffee-to-water ratio adjusts to accommodate these factors. The accepted range for the coffee-to-water ratio in a French press can vary from 1:12 to 1:18, catering to diverse taste preferences. This implies that you'll brew approximately 15g of coffee in roughly 225g of water per person.
Once you embrace the use of brewing ratios, your home coffee endeavors will experience an instant enhancement, with minimal effort required to significantly elevate the flavor.
Exploring Brewing Ratios for Various Methods
Now, let's delve into how brewing ratios differ among various methods, from traditional drip coffee to the trendy espresso:
Espresso: Espresso, celebrated for its boldness, typically adheres to a 1:2 ratio (coffee to water). In simpler terms, using 18g of coffee yields 36g of espresso, making it a favored choice among Minnesota coffee roasters.
Manual Pour Over: For those who savor a more delicate brew, the ratio hovers around 1:16, allowing for a balanced and nuanced flavor profile.
French Press: Due to its extended extraction time, French press coffee adopts ratios ranging from 1:12 to 1:17, catering to diverse taste preferences.
Moka Pot: This stovetop classic thrives with a ratio of roughly 1:10, delivering a rich and concentrated coffee experience.
Aeropress: The versatile Aeropress offers flexibility, with ratios spanning from 1:6 to 1:12, accommodating both bold and milder brews.
Embracing Precision - Measuring with Grams
Consistency holds the key to successful coffee brewing, underscoring the significance of precision. Incorporating a dependable coffee scale into your brewing routine becomes imperative. In this context, grams, not casual scoops, become the standard unit of measurement, particularly for Minnesota air roasting enthusiasts on a quest for the perfect cup.
These scales are meticulously designed to withstand the rigorous demands of coffee preparation, ensuring precision and enabling meticulous adjustments to brewing ratios.
Whether you're situated in Big Lake, MN, or any corner of the world, mastering the coffee-to-water ratio embarks you on a journey toward exceptional coffee experiences. Embrace the amalgamation of art and science in brewing, and you'll relish every cup from your preferred Minnesota coffee roaster.
At Ember Coffee, we air-roast every batch in Big Lake, Minnesota. Browse our air-roasted coffee, or learn about how air-roasting works.
It might sound odd, but a tiny pinch of salt can cut the bitterness of black coffee, making it easier to enjoy. In this guide, we’ll share alternatives to cream and sugar, and show you how to brew a cup of black coffee that you’ll truly savor.
What is Black Coffee?
Black coffee is coffee brewed with water and enjoyed without any additives such as dairy products, sweeteners, or flavoring.
Why Do We Add Cream and Sugar to Coffee?
Plainly put, sometimes coffee just doesn’t taste good by itself. Sometimes it’s thin, bitter, sour, or lacking depth. So adding things like dairy products, sugar, or flavoring helps to improve the enjoyment of coffee.
Dairy products, and their alternatives, improve two factors. First, they add texture and creaminess to coffee, improving the mouthfeel which is vital to enjoying coffee. Second, the fat from dairy or alternatives smooths out coffee’s bitterness.
Sweeteners like sugar, honey, Splenda, or Stevia not only sweeten your cup, they cut the bitterness of coffee.
What Makes Coffee Bitter?
Bitterness is naturally produced while coffee solubles are extracted during the coffee brewing process. Coffee’s soluble materials include caffeine, acids, sugars, lipids, and carbohydrates, all of which contribute to coffee’s flavor. Chlorogenic acid is the particular acid to blame for coffee’s bitterness. Though this acid is found in all coffee, that doesn’t mean all coffee needs to taste unpleasantly bitter.
There is a science and an art to producing a balanced cup of coffee. This starts with the varietal of bean used. Arabica beans have significantly fewer chlorogenic acids than its sibling, Robusta, which is one of the primary reasons Arabica is the most popular varietal of coffee bean consumed. But how the coffee is roasted and how it’s brewed also contribute to producing a balanced and pleasant cup of coffee.
During the roasting process, chlorogenic acids are broken down into lactones and phenylindanes. Acid lactones contribute to a pleasant coffee-like bitterness, whereas phenylindanes contribute to the unpleasant type of bitterness we desire to mask. The longer coffee is roasted, the higher the presence of phenylindanes. This is why darker roasted coffees taste more bitter than lighter or medium roasted coffees.
During the brewing process, coffee that is over-extracted will also taste bitter. This is because the bitter-tasting solubles overwhelm the sweet solubles. To learn how to not over-extract or under-extract your coffee, learn about brewing on our Coffee Brewing Basics guide.
Benefits of Drinking Black Coffee
When drunk black, coffee is a zero-calorie beverage. And though not a recommended source of nutrition, it does contain micronutrients such as potassium, magnesium, and niacin, as well as very small amounts of sodium. Coffee also contains antioxidants and vitamins like B2, B3, and B5. Adding cream and sugar to your coffee can turn it into a high-caloric and unhealthy beverage. So if you’re looking to lose weight or improve your health, consider taking your coffee black.
Caffeine in Black Coffee
When measuring caffeine content, espresso typically has a greater amount of caffeine than batch brewed coffee. But dilution must be considered when measuring caffeine consumption. When espresso is added to milk or water, its caffeine content is greatly diluted. The same is true when creamer is added to a cup of coffee—its volume increases without increasing its caffeine content. So when switching to taking your coffee black, keep in mind your caffeine consumption may increase since you’re not diluting it with anything.
Alternatives to Sugar in Coffee
If you find yourself with a bitter cup of coffee and need to cut it with a sweetener, there are many alternatives to sugar.
Honey: A healthier and natural alternative to sugar. Especially when locally sourced, honey contains antioxidants and other micronutrients.
Stevia: A natural sweetener that comes from the leaves of the stevia plant. Stevia comes in a powder form that is great for convenience. Stevia does have a noticeable flavor that can impact the coffee’s taste.
Synthetic sweeteners: Have long been the easy alternative to sugar. Just be mindful of the amount you use; they’re far sweeter than sugar.
Agave syrup: Another natural alternative that dissolves really well in coffee. It also doesn’t impact quite as much flavor as alternatives like Stevia.
Alternatives to Milk in Coffee
Though we prefer milk from a local pasture-raised dairy, there are now more alternatives than ever to use in coffee.
Oat milk: Quickly rising as the most popular alternative to dairy. It tends to impart less flavor than soy or almond milk.
Almond milk: A great option, especially for cold coffee beverages. Its almond flavor tends to pair well with most coffees.
Hemp milk: A bit harder to find but is another great choice. It also contains more iron than cow’s milk.
Cashew milk: Quickly becoming a favorite. It provides a creamy texture without the additives found in oat and almond milk.
How to Make Black Coffee
Switching to taking your coffee black doesn’t mean you have to enjoy your coffee less. In fact, people who solely drink coffee black often do so because they enjoy it more.
Start with quality coffee beans from a local Minnesota roaster, such as Ember Coffee. That's step number one! Coffee that is over-roasted, low quality, or old, will produce an unbearable bitter cup. So start with fresh beans that are light to medium roasted and preferably, whole bean.
Then upgrade your grinder. Grinding your coffee fresh and taking the time to grind them at the appropriate fineness will produce a juicy and balanced cup that’ll make you completely forget about your creamer. Coffee that is ground too fine will over-extract and make your cup taste bitter. Coffee ground to coarse will under-extract and taste sour.
Lastly, find a brew method that works best for your preferences and schedule. We guarantee that if you master your brew method by following our brew guides, you won’t miss cream and sugar for a moment.
At Ember Coffee, we air-roast every batch in Big Lake, Minnesota. Browse our our air-roasted, low-acid coffee, or learn about how air-roasting works.
In honor of National Dessert Day, we're unveiling our cherished cake recipe, originally from "Sweet" by Yotam Ottolenghi and Helen Goh. Dubbed the "World’s Best Chocolate Cake," this Big favorite can be enjoyed with a light cocoa dust or lavishly garnished with chocolate ganache and espresso cinnamon mascarpone cream, a perfect pairing with a brew from our local coffee roaster, Ember Coffee Co.
For a true Big Lake experience, pair this with a cup of our Night Owl French roast, available in our online store for one-time orders or a monthly subscription. As always, for impeccable results, weigh your ingredients in grams.
Source: https://cooking.nytimes.com/recipes/1018930-worlds-best-chocolate-cake
INGREDIENTS
Yield:
12 servings
FOR THE CAKE
1 cup plus 1½ tablespoons/250 grams unsalted butter (2 sticks plus 1½ tablespoons), at room temperature and cut into ¾-inch/2-centimeter cubes, plus extra for greasing the pan
7 ounces/200 grams dark chocolate (70 percent cocoa solids), chopped into ¾-inch/2-centimeter pieces
1½ teaspoons instant coffee granules, dissolved in 1½ cups/350 milliliters boiling water
1¼ cups/250 grams granulated sugar
2 large eggs, lightly beaten
2 teaspoons vanilla extract
1¾ cups plus 2 tablespoons/240 grams self-rising flour (see note)
⅓ cup/30 grams Dutch-processed cocoa powder, plus 1½ teaspoons, for dusting
¼ teaspoon salt
FOR THE CHOCOLATE GANACHE (OPTIONAL)
7 ounces/200 grams dark chocolate (70 percent cocoa solids), broken or chopped roughly into ¾-inch/2-centimeter pieces
¾ cup/180 milliliters heavy cream
1 tablespoon light corn syrup
1 tablespoon unsalted butter, at room temperature
FOR THE ESPRESSO CREAM (OPTIONAL)
1½ cups plus 1 tablespoon/375 milliliters heavy cream
¾ cup/190 grams mascarpone
Scraped seeds of ½ vanilla pod
2½ teaspoons finely ground espresso
¾ teaspoon ground cinnamon
2½ tablespoons confectioners’ sugar
PREPARATION
Heat oven to 350 degrees Fahrenheit/170 degrees Celsius. Grease a 9-inch/23-centimeter round springform pan with butter and line with parchment paper, then set aside.
Make the cake: Place butter, chocolate and hot coffee in a large heatproof bowl and mix well until everything is melted, combined and smooth. Whisk in sugar by hand until dissolved. Add eggs and vanilla extract and whisk again until thoroughly combined and smooth. Sift flour, cocoa powder and salt together into a bowl and then whisk this into the melted chocolate mixture. The batter here is liquid, but don’t think you have missed something; this is how it should be.
Pour batter into the prepared pan and bake for 1 hour, or until the cake is cooked and a skewer inserted into the center comes out clean or with just a few dry crumbs attached. The top will form a crust and crack a little, but don’t worry, this is expected. Leave the cake to cool for 20 minutes before removing from the pan, then set aside until completely cool.
Make the chocolate ganache, if desired: Place chocolate pieces in a food processor, process until fine and set aside. Combine cream and corn syrup in a small pan and place over medium-high heat. As soon as bubbles begin to appear (just before it comes to a boil), remove from the heat. Get the food processor running again, with the chocolate still inside, and pour in the hot cream in a steady stream. Process for 10 seconds, then add butter. Continue to process until mixture is shiny and smooth. (You can also make the ganache by hand; just make sure the chocolate is chopped fairly finely before adding the cream mixture. Stir with a wooden spoon until almost melted, then add the butter. Stir again until the ganache is smooth.)
Use a rubber spatula to scrape the ganache into a bowl and cover with plastic wrap, with the plastic actually touching the top of the ganache. Set aside until it has set to the consistency you want. If you want a thin layer to spread over the cake, it can be poured over while liquid so that you get an even, light and shiny coating. For a thicker ganache with a spreading consistency, leave it for about 2 hours at room temperature. (The ganache can be stored at room temperature, providing it’s not too warm, for 3 days or kept in the fridge for up to 2 weeks. It can also be frozen, although it will lose a bit of its shine when defrosted.)
Make the espresso cinnamon mascarpone cream, if desired: Place all the ingredients in the bowl of an electric mixer fitted with the whisk attachment. Beat for 1 to 2 minutes, until soft peaks form.
Peel the parchment from the cake and discard. Transfer to a serving platter and spread the ganache, if using, on top of the cake. Slice into wedges, divide the cake among plates and, if using, spoon the mascarpone cream alongside. With or without icing, the cake will keep well for 4 to 5 days in an airtight container.
If you can’t find self-rising flour, whisk together 1¾ cups plus 2 tablespoons/240 grams all-purpose flour and 2¾ teaspoons baking powder and use this mixture instead.
At Ember Coffee, we air-roast every batch in Big Lake, Minnesota. Browse our air-roasted coffee, or learn about how air-roasting works.
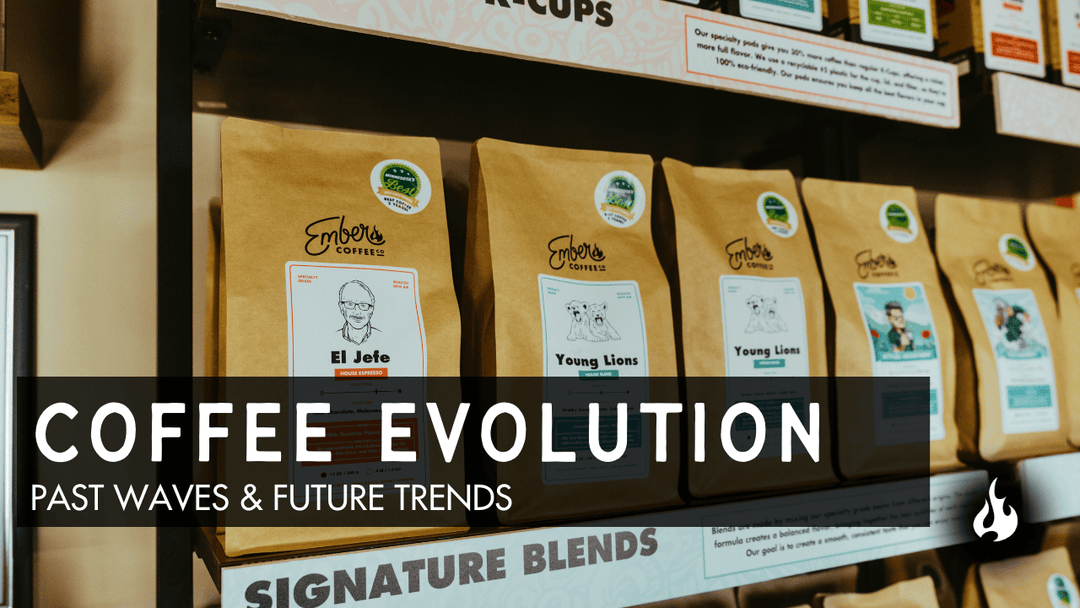
The concept of "waves" in coffee has served as a vital framework for understanding the evolution of the coffee industry. Each wave represents a pivotal transition in how coffee is produced, perceived, and consumed. Originally coined by Trish Rothgeb in 2002, these waves have helped coffee enthusiasts, producers, and professionals contextualize the dynamic shifts within this beloved industry.
But as we enter an era of blurred boundaries between waves, some argue the framework may no longer be relevant. Are these "waves" nostalgic relics of coffee culture, or do they still hold the power to inspire and guide us? Join us as we explore coffee’s rich history, its transformations, and where this delicious bean might take us next.
The Power of Categorization in Coffee
Why Are "Waves" Important to Coffee's History?
Coffee waves provide historical context, helping enthusiasts and industry professionals alike connect shifts in coffee culture to broader social, technological, and economic changes. Each wave highlights how coffee transitioned from necessity to culture, to craft, and beyond.
Trish Rothgeb’s classification wasn’t merely a timeline. It was a call to reflect on the state of coffee and where it could go. By understanding the waves, we gain insight into how the industry has shaped the experiences of coffee lovers throughout history.
Coffee's Transformations: From Commodity to Craft
First Wave Coffee: Democratizing the Bean
The first wave of coffee began in the early 1800s when coffee became widely available to households. With the rise of brands like Folgers and Maxwell House, coffee was marketed for its convenience and affordability, not its quality. Instant coffee and pre-ground blends dominated store shelves, cementing coffee as a morning staple.
This wave was the foundation of coffee culture, making the beverage accessible to millions. However, taste and quality took a back seat, as the focus was primarily on caffeine delivery.
Second Wave Coffee: Coffee Culture Takes Root
The second wave of coffee, which emerged in the 1970s, elevated coffee from a commodity to an experience. Coffeehouse chains like Starbucks and Peet's introduced consumers to espresso drinks, “fresh” roasts closer to their roasting date, and the idea of coffee as a social experience.
During this phase, brewing became more than functional. Cafés became community hubs, and coffee was tied to identity and lifestyle. While quality received attention, the second wave primarily focused on creating an accessible, inviting atmosphere.
Third Wave Coffee: The Craft Movement
The third wave, heralded in the early 2000s, regarded coffee as an artisanal product. Enthusiasts compared it to fine wine or craft beer, emphasizing the art and science of coffee production. This era drew attention to the bean's origin, processing methods, and the growers behind the cup.
Specialty coffee roasters, including many Minnesota coffee roasters like Ember Coffee in Big Lake, became central to this era. They embraced innovations like lighter roasts that brought out unique flavor notes and fostered direct trade relationships with farmers. A coffee from Ethiopia, for example, was no longer simply a “bean”—it was a story of soil, altitude, and craftsmanship. Transparency, sustainability, and roasting expertise defined the third wave.
For modern coffee lovers, the third wave is still alive in spaces that champion single-origin, ethically sourced coffee in Minnesota and beyond.
The Contested Fourth and Fifth Waves of Coffee
Fourth Wave Coffee: Science vs. Scalability
Defining the fourth wave of coffee is tricky because its identity depends on perspective. Some argue that fourth wave coffee emphasizes precision and science, relying on technological breakthroughs to create the perfect cup. Precision tools, water chemistry, and frozen beans are hallmarks of this shift.
Others suggest that scalability is the defining characteristic. The fourth wave makes specialty coffee more accessible to mainstream audiences, blending craft with commerce and broadening the reach of high-quality coffee to less mature markets. For example, Minnesota-based operations tapping into specialty coffee trends have shown it is possible to scale without sacrificing quality.
Fifth Wave Coffee: Craft Meets Big Business
The fifth wave is the most debated of all. Often described as "scaled boutique hospitality," it seeks to deliver a hospitality-driven, artisanal experience on a large scale. This means quality, customer service, and business priorities blend seamlessly to offer both craft and convenience.
However, some critics believe the fifth wave is more marketing than substance. They argue it simply packages fourth-wave values with a sharper emphasis on profit and scalability (debate source).
Commentators Are Split: Are Coffee Waves Still Needed?
The Case for Coffee Waves
While critics argue that waves oversimplify the complexity of a global industry, the framework serves an important purpose. For coffee brands—including award-winning coffee roasters or regional hubs like Central Minnesota roasters—the historical lens of waves helps position businesses and educate consumers about the evolution of coffee.
Understanding waves can demystify specialty coffee for those just entering the world of craft coffee. Whether you buy coffee at Starbucks or from a local Minnesota roaster like Ember Coffee, the waves provide an easy way to understand where your favorite brew fits into coffee's history.
The Case Against Coffee Waves
On a global scale, the waves can feel reductive. Coffee trends in Big Lake, Minnesota, might focus on accessible specialty roasts, while emerging markets like Eastern Europe or India may still be in their second wave. The framework doesn’t easily accommodate regional differences.
Critics also argue that waves neglect producers, the people growing and harvesting coffee beans. While consumers enjoy innovation, producers face challenging questions about climate change, sustainability, and fair pricing that don’t easily align with the wave framework.
Beyond Waves: Coffee’s New Frontiers
The future of coffee may not lie in waves but in emerging trends that transcend past classifications. Here are three dynamic shifts shaping what's next:
1. Producer-Centric Coffee
A growing emphasis on the well-being of coffee producers is reshaping supply chains. Fair trade and direct trade models are evolving to provide long-term support for farmers while ensuring ethically sourced coffee continues to delight consumers.
2. Sustainability as a North Star
From compostable packaging to carbon-neutral coffee farms, sustainability is becoming central to the industry. Consumers are increasingly choosing brands, like certain Minnesota roasters, that are committed to environmentally friendly practices.
3. Technology Transforming Coffee Experiences
Whether through precision grinders, AI-driven roasting, or app-based brewing methods, technology continues to revolutionize how we engage with coffee. The right innovations blend progress with accessibility, satisfying veteran enthusiasts and newcomers alike.
What the Future Holds for Coffee Enthusiasts
Understanding waves can still be helpful, but coffee’s future may lie in blended approaches. Whether you brew your daily cup at home or visit a Minnesota coffee roaster, one truth persists: coffee has endless depth for exploration.
Want to learn more about what makes great coffee? Visit your local specialty coffee shop, or explore curated blends through trusted names in ethical coffee, like award-winning Minnesota coffee brands that emphasize craft, quality, and community.
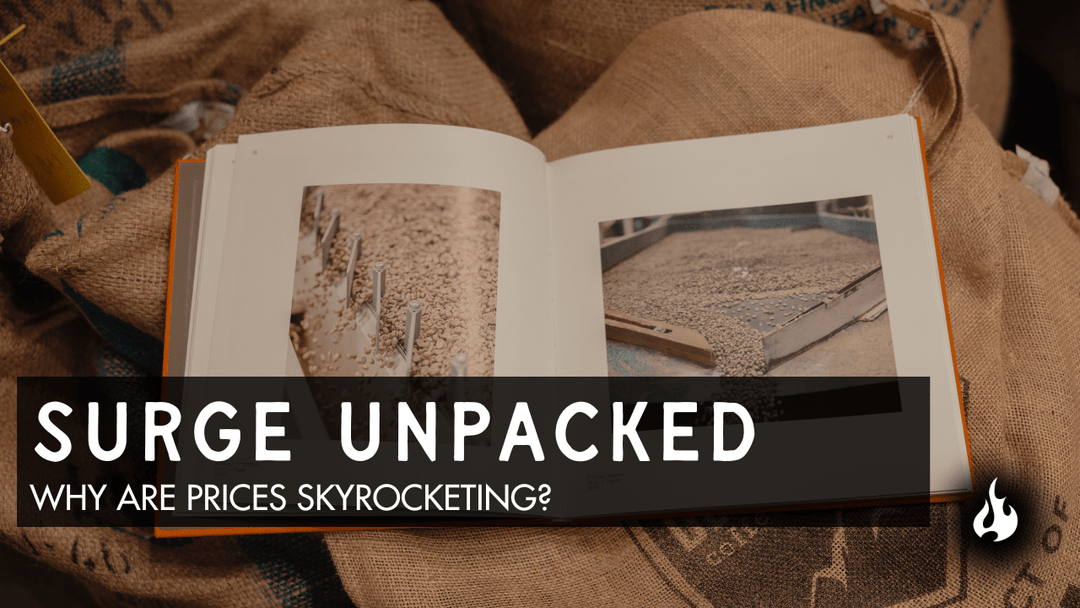
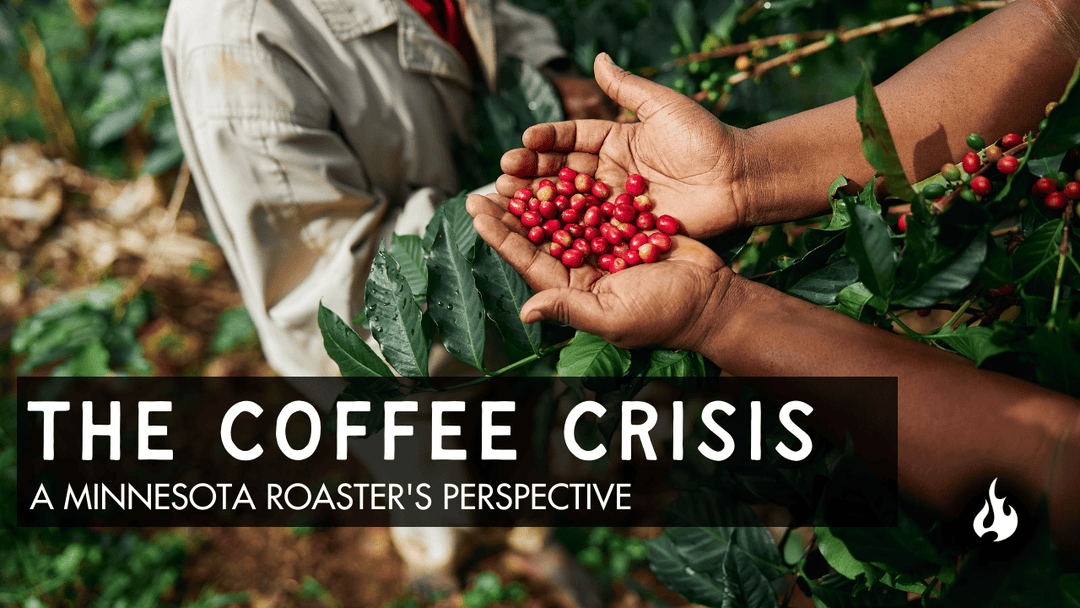
Coffee is more than just a drink; it's a ritual that unites us, a moment of warmth in our busy lives. For those of us nestled in Big Lake, Minnesota, sipping on a locally roasted brew from Ember Coffee, this connection feels especially profound. But as we cozy up with our cups, a seismic shift is rippling through the coffee world. Arabica futures have hit an unprecedented high of over US $4.30/lb, ushering in a new era that impacts everyone from coffee roasters near me to global traders.
Unpacking the Surge: Why Are Prices Skyrocketing?
This price hike isn't just a blip; it's a result of several converging factors. Brazil and Vietnam, the world's coffee giants, are grappling with supply shortages, compounded by climate-related challenges. Meanwhile, geopolitical tensions, like the fallout from tariff threats and the Russia-Ukraine conflict, have disrupted global trade flows, adding pressure to already strained stockpiles.
For those of us enjoying our morning brew, this might seem distant. But remember, every sip we take is part of a vast, interconnected supply chain. And right now, that chain is under strain.
What Does This Mean for Our Local Coffee Scene?
In Big Lake, where the air is crisp and community ties are strong, we're witnessing firsthand how these global shifts trickle down. Local coffee roasters, including our team at Ember Coffee, are facing tough decisions. Prices are volatile, and the costs of production—like fertilizers and wages—are escalating.
How we're navigating these waters
Transparent Communication: We're committed to keeping you informed. Understanding the value of coffee means appreciating the journey from bean to cup, and we're here to share that story.
Sustainable Practices: Ethical sourcing remains at our core. Despite market fluctuations, we prioritize relationships with farmers, ensuring they receive fair compensation for their hard work.
Air Roasting Excellence: Our unique air roasting process not only enhances flavor but also showcases our commitment to quality. It's a gentle method that lets the beans' natural characteristics shine—a perfect match for our award-winning coffee.
A Silver Lining: Opportunities for Connection
While these price hikes pose challenges, they also offer a chance to deepen our connection to coffee. As prices rise, so does the opportunity to engage in meaningful conversations about the true value of every cup.
How you can be part of the journey
Learn with Us: Explore the complexities of coffee pricing, from climate impacts to market dynamics. Knowledge enhances appreciation, turning every sip into a moment of mindfulness.
Support Local: By choosing locally roasted options, you contribute to a sustainable supply chain that benefits producers and our community. It's not just about coffee; it's about making a difference.
Embrace At-Home Brewing: With more people brewing at home, now's the perfect time to experiment with different flavors and techniques. Our team is here to guide you, whether you're a seasoned barista or a curious newcomer.
Looking Ahead: The Future of Coffee
As we adjust to this new normal, one thing remains clear: coffee is resilient. The industry has weathered storms before, and together, we'll navigate these changes with grace and adaptability.
What can we expect?
Price Adjustments: While prices may continue to rise, the focus will be on finding a balance that supports both producers and consumers. Industry analysts predict retail coffee prices could increase by up to 25%, a shift that will require careful navigation.
Consumer Behavior Shifts: As prices rise, we may see more people opting for at-home brewing or seeking value brands. Yet, the love for quality coffee remains strong, especially in communities like ours that value authenticity and connection.
Ongoing Education: We'll continue to share insights and stories, from the farms where our beans grow to the cups we enjoy. It's about fostering a deeper understanding and appreciation for the craft of coffee.
Join Us in This Journey
At Ember Coffee, we believe in the power of community and the magic of a good cup of coffee. As this new era unfolds, we invite you to join us in exploring, learning, and savoring every moment. Whether you're a neighbor in Big Lake or a coffee lover from afar, let's raise our mugs to resilience, connection, and the rich tapestry of flavors that bring us together.
Making a Difference with Every Cup
At Ember Coffee, nestled in the heart of Big Lake, Minnesota, we're more than just your average coffee roasters near you. We're a community-focused hub dedicated to making a significant impact through our award-winning coffee. Our fundraising program is designed to support your goals, offering a unique way to raise funds while enjoying the rich, locally roasted coffee that you love.
The Unique Appeal of Coffee Fundraising
Why choose coffee for your next fundraiser? It's simple: coffee is a part of the daily routine for millions of people. This makes it not just convenient but also a highly effective fundraising product. Here’s why coffee stands out:
Universal Appeal: Coffee is enjoyed by a vast audience every day, unlike seasonal or niche items.
Everyday Staple: It integrates seamlessly into daily lives, making it a practical choice for supporters.
Long Shelf Life: Unlike perishables, coffee maintains its quality over time, ensuring your fundraiser is stress-free regarding product handling.
How Our Fundraising Program Works
Partnering with Ember Coffee means you're set for a straightforward and impactful fundraising journey. Here’s how we make it happen:
Simple Setup: We use Shopify to integrate sales processes smoothly, making management hassle-free.
Support Materials: You’ll receive all the marketing materials and support needed to promote your fundraiser effectively.
Transparent Pricing: We ensure clarity in pricing and profits, so there are no surprises along the way.
Customization Options: Personalize your coffee labels to make each bag of coffee feel special to your supporters.
Why Ember Coffee is Your Ideal Fundraising Partner
Choosing Ember Coffee for your fundraiser isn’t just about selling coffee—it's about creating an experience and making an impact. Here’s what makes us stand out:
Locally Roasted Perfection: Our coffee is roasted locally in Minnesota, ensuring every batch is fresh and flavorful.
Ethical Sourcing: We prioritize ethical sourcing, ensuring that every cup provides not only pleasure but also peace of mind.
Ongoing Support: Our team is here to guide you through each step, providing the tools and advice needed to maximize your success.
A Step-by-Step Guide to Running an Effective Fundraiser
To launch a successful fundraising campaign, consider these practical steps:
Define Your Goals: Clearly articulate what you’re raising funds for. This clarity motivates and connects people to your cause.
Build a Dedicated Team: Assign roles and responsibilities to ensure every aspect of your fundraiser is covered.
Create a Timeline: Set deadlines for order placements and deliveries to keep your campaign on track.
Promote Actively: Use social media, emails, and community events to spread the word effectively.
Engage and Motivate: Keep your team motivated with incentives and regular updates to maintain high energy levels.
Simplify Participation: An easy-to-navigate online store will make it straightforward for supporters to contribute.
Year-Round Fundraising Strategies
To keep the momentum going throughout the year, consider these strategies:
Plan Ahead: Outline your main fundraising activities for the year to avoid last-minute planning.
Vary Your Methods: Mix different types of fundraising activities to keep your audience engaged and interested.
Leverage Seasonal Opportunities: Take advantage of specific times of the year that are conducive to fundraising.
Keep Communicating: Regular updates keep your community involved and informed about your efforts.
Show Appreciation: Always thank your supporters and share the outcomes of their contributions to reinforce trust and appreciation.
Why This Matters
At Ember Coffee, we believe in the power of community and the simple joy of a great cup of coffee. Our fundraising program is more than just an opportunity to raise money; it's a chance to bring people together, support local efforts in Minnesota, and enjoy some of the finest locally roasted coffee around.
Ready to start your fundraising journey with us? Reach out to us today and let’s brew some success together!
At Ember Coffee, we air-roast every batch in Big Lake, Minnesota. Browse our coffee fundraising with Ember, or learn about our coffee.
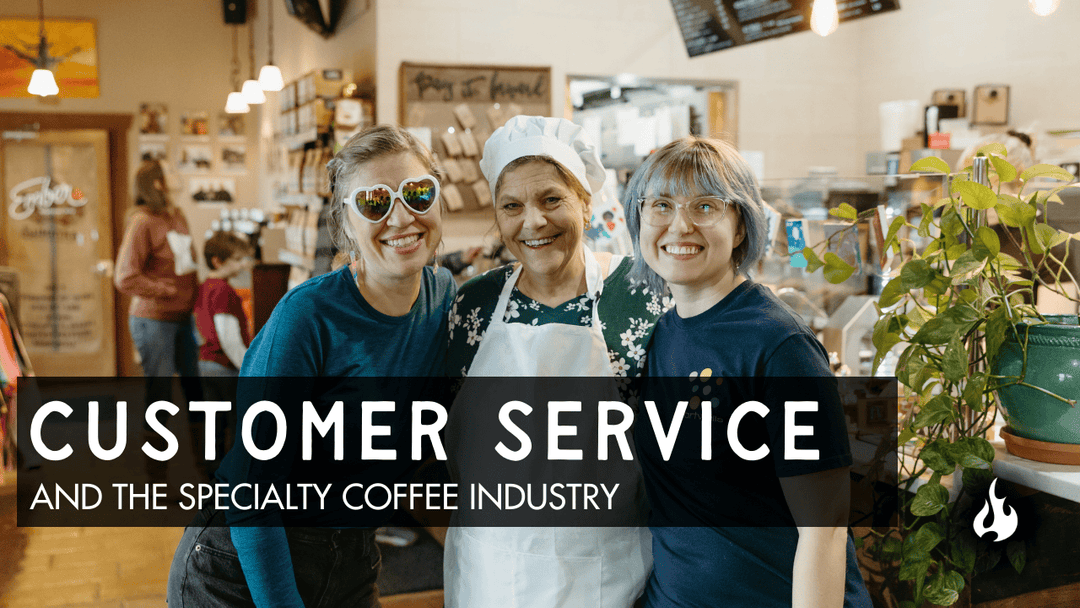
The Essence of Specialty Coffee
Coffee is more than just a caffeinated beverage. It’s a ritual, a conversation starter, and a bridge that connects people. At Ember Coffee, nestled in the heart of Big Lake, Minnesota, we believe in creating that connection through our locally roasted, award-winning coffee. Today, we want to delve into the importance of customer service in the specialty coffee industry, and how we strive to uphold it in spite of the growing trend towards automation.
Since the birth of the coffee industry, customer service has been paramount. The evolution from consumers expecting their coffee to be roasted for them in the 1800s to the modern-day emphasis on freshness, quality, and craft, has transformed the way coffee shops engage with their customers. The rise of chains like Starbucks and Peet’s has put hospitality and service at the forefront of business operations, a trend that third wave and specialty coffee brands, like Ember Coffee, have embraced and built upon.
However, the increasing adoption of automation in the industry presents a challenge. While new technologies streamline service, they also risk diluting the barista culture, a vital part of the specialty coffee experience. As Starbucks' recent strategy shift towards simpler menus and premium experiences demonstrates, coffee shops can't afford to sacrifice the customer experience for efficiency.
In an article published by Perfect Daily Grind, Maxwell Colonna-Dashwood, the managing director of Colonna Coffee, and Laila Ghambari, the owner of Juniors Roasted Coffee and Guilder Café, discuss the complexities of offering exceptional customer service in the specialty coffee industry.
The Art of Customer Service in Specialty Coffee
In the world of specialty coffee, baristas are not just service providers; they are artisans. They dial in espresso, pour latte art, hand brew pour overs, and explain the nuances of extraction and flavor. This transforms coffee into more than just a product, creating an elevated sense of hospitality and enhancing the overall customer experience.
However, as the industry expands and becomes increasingly competitive, offering exceptional service and serving high-quality coffee alone is no longer enough to retain a consumer base and attract new customers. Even Starbucks, a giant in the industry, has grappled with this challenge, as their sales dipped in key markets throughout 2023 and 2024.
Specialty Coffee's Edge: Authenticity and Connection
Despite the challenges, specialty coffee shops like Ember Coffee have an edge over bigger chains. Our commitment to artisanry, craft, and ethical sourcing signals to our customers that they are not just buying a product, but an experience. We believe in fostering intimate relationships with our customers, creating a personable service that larger coffee businesses often struggle to replicate.
According to the Edelman Trust Barometer, 88% of consumers said trust is critical when deciding which brands to buy or use, with customer service a close second at 85%. This puts specialty coffee shops and roasters in a better position to navigate an increasingly challenging market.
The Double-Edged Sword of Automation
Automation has become a prominent part of the coffee industry. While it improves efficiency and resolves persistent problems such as staff training and barista shortages, it also risks eroding the artistry required to prepare and serve quality coffee. The increasing prominence of touchscreen kiosks and QR codes in restaurants and hospitality businesses might have improved efficiency, but it also risks creating a “faceless” business.
As we move towards a more automated future, it's crucial for coffee shops to strike a balance between efficiency and hospitality. The face-to-face human connection that baristas provide proves critical for specialty coffee shops to stay true to their core values of hospitality. However, it’s only one part of a much wider customer experience.
Navigating the Future of Customer Service in Specialty Coffee
The rise of tech-driven solutions for coffee shops will undoubtedly improve efficiency, consistency, and speed of service. But with a challenging year ahead, coffee shops may choose to implement automation across the board, streamlining more than just coffee preparation.
As Laila Ghambari rightly points out, "The future of customer service is not about sharing more information but investing in the experience that guests have, whether with a person or not." Digital hospitality will become more important, and customer service will continue evolving.
At Ember Coffee, we are committed to navigating these changes without losing sight of what makes us unique. We understand that our customers don't just come to us for our award-winning, locally roasted coffee. They come to us for the conversations, the connections, and the community that we foster. And no matter how the industry evolves, that is something we will always strive to provide.
A Minnesota Roaster's Perspective
As the sun rises over the snowy landscape of Minnesota, the aroma of freshly roasted coffee wafts through the air at Ember Coffee's roastery. It's a scent that has become increasingly precious in recent months, as the coffee industry grapples with unprecedented challenges. As a local roaster deeply committed to our community, we want to share our journey through these turbulent times and our vision for the future.
The Perfect Storm Brewing in Our Cups
The story of today's coffee crisis begins far from our cozy Minnesota cafes, in the lush hillsides of Colombia and the vast plantations of Brazil. A series of events have converged to create what many in the industry are calling a "perfect storm":
Climate Chaos: Mother Nature has not been kind to coffee growers lately. In Brazil, the world's largest coffee producer, severe droughts followed by unexpected frosts have decimated crops. Farmers watched helplessly as their carefully tended plants withered under the scorching sun or succumbed to the icy grip of frost. The result? A staggering 40% reduction in yields in some areas.
Unseasonal Deluges: Meanwhile, in Vietnam, the second-largest coffee producer globally, unseasonal rains have wreaked havoc. Coffee cherries, which should have been ripening under gentle sunshine, instead rotted on the branches, leading to significant crop losses and quality issues.
Geopolitical Jitters: As if weather woes weren't enough, the coffee market found itself caught in a political crossfire. In early 2025, rumors swirled about potential U.S. tariffs on Colombian coffee. Though never implemented, the mere whisper of trade restrictions sent prices soaring by 15% in just a week, highlighting the fragility of global coffee trade relationships.
Supply Chain Snarls: The journey of coffee beans from farm to cup has become increasingly complex and costly. Ongoing logistical challenges, exacerbated by fuel price hikes and labor shortages, have inflated transportation costs. The price of shipping a container of coffee has tripled since 2023, adding another layer of pressure to already strained margins.
Market Speculation: As news of crop failures and potential shortages spread like wildfire, market speculators pounced. Their actions drove coffee futures to unprecedented heights, with the C-market price for Arabica coffee reaching a jaw-dropping $3.84 per pound in February 2025 – a 47-year high.
The Ripple Effect Reaches Minnesota
Here at Ember Coffee, nestled in the heart of Minnesota's vibrant coffee scene, we've felt the tremors of these global shifts. The impact on our operations and community has been profound:
Margin Squeeze: Green coffee now accounts for a staggering 60-70% of our production costs, up from 40-50% just two years ago. This dramatic increase, coupled with rising energy and labor costs, has put immense pressure on our margins.
Sourcing Struggles: Maintaining the consistent flavor profiles our customers love has become increasingly challenging. We've had to be more flexible in our sourcing, sometimes substituting origins or adjusting roast profiles to compensate for changes in bean characteristics.
Pricing Predicaments: As a community-focused roaster, we're acutely aware of the impact price increases have on our customers. We've been forced to make difficult decisions about when and how to adjust our pricing to reflect the new market realities while remaining accessible to our loyal patrons.
Crafting a Sustainable Future, One Bean at a Time
Despite these challenges, we at Ember Coffee believe that this crisis presents an opportunity for positive change. Like the phoenix rising from the ashes, we're determined to emerge stronger and more sustainable. Here's how we're adapting:
Nurturing Direct Trade Relationships: We're doubling down on our direct trade partnerships, offering long-term contracts at stable prices to our farmer partners. This approach not only secures our access to high-quality beans but also provides farmers with the financial security to invest in sustainable practices and climate adaptation measures.
Diversifying Our Offerings: To offset rising costs and keep things exciting for our customers, we're expanding our product range. Limited edition micro-lots, experimental processing methods, and unique Minnesota-inspired coffee blends are just a few of the innovations we're exploring.
Empowering Through Education: We believe that an informed customer is a loyal customer. We've launched a series on Roasting 101 on our YouTube site, and we're planning a Coffee 101 cupping sessions at our Big Lake roastery. These programs help our community understand the complexities of coffee production and pricing, fostering a deeper appreciation for the craft behind each cup.
The Power of the Minnesota Coffee Lover
As we navigate these challenges, the support and understanding of our customers are more crucial than ever. Here's how Minnesota coffee enthusiasts can contribute to a more sustainable coffee ecosystem:
Embrace Transparency: We encourage our customers to ask questions about pricing, sourcing, and roasting practices. Understanding the true cost of producing exceptional coffee can help justify price adjustments when necessary.
Value Quality Over Quantity: By choosing to invest in higher-quality, ethically sourced coffee, consumers can help support fair wages for farmers and sustainable agricultural practices.
Support Local Roasters: Minnesota's local roasters, like Ember Coffee, are deeply invested in our communities. By choosing local over national chains, consumers help keep money circulating in the local economy and support businesses that prioritize sustainability and ethical sourcing.
Experiment with Brewing Methods: Different brewing methods can extract unique flavors from coffee beans. By exploring various brewing techniques, consumers can maximize the value and enjoyment they get from each bag of coffee.
Envisioning a Brighter Future for Minnesota Coffee
As we look to the horizon, we see challenges, but also immense potential. Our vision for the future of specialty coffee in Minnesota is one of resilience, innovation, and community:
A More Resilient Supply Chain: We're exploring collaborations with other Minnesota roasters to potentially secure better prices and more stable supply chains through collective purchasing power.
Increased Local Collaboration: We envision a future where coffee is increasingly integrated into Minnesota's local food scene. Imagine coffee-infused craft beers, chocolate truffles featuring our single-origin roasts, or seasonal menus at local restaurants built around coffee pairings.
Innovation in Sustainability: We're investing in research on more sustainable packaging options and exploring ways to upcycle coffee chaff and other by-products of the roasting process. Our goal is to minimize our environmental impact while maximizing the value we create.
A More Educated Consumer Base: Through continued education efforts, we aim to cultivate a community of coffee enthusiasts who appreciate the craftsmanship behind every cup and understand the global impact of their purchasing decisions.
Conclusion: United in Our Love for Great Coffee
As the aroma of freshly roasted coffee continues to fill our roastery, we're reminded of why we do what we do. The current coffee price crisis is undoubtedly one of the most significant challenges our industry has faced in decades. However, at Ember Coffee, we believe that by staying true to our values of quality, sustainability, and community, we can not only weather this storm but emerge stronger on the other side.
To our loyal customers and coffee lovers across Minnesota: your support during these turbulent times means more than you know. Every bag of Ember Coffee you purchase, every latte you enjoy in our cafe, is a vote for a more sustainable and equitable coffee future.
As we navigate these uncharted waters, we remain committed to transparency, quality, and the relentless pursuit of the perfect cup. Together, we can ensure that Minnesota remains a beacon of excellence in the world of specialty coffee, no matter what challenges lie ahead.
Thank you for being part of our journey, for your understanding during these difficult times, and for your unwavering love of great coffee. Here's to many more shared moments over a steaming cup of Minnesota's finest brew.
Warmly,The Ember Coffee Team